This post is for people that struggle to visualize a tour using only guidebooks with 2D imagery, topo maps, etc. Did you know that you can preview your tour using GPX tracks imported to Google Earth? I find that this is a great way to get a clearer mental model for new terrain. Let’s dive in!
WHAT’S A GPX TRACK?
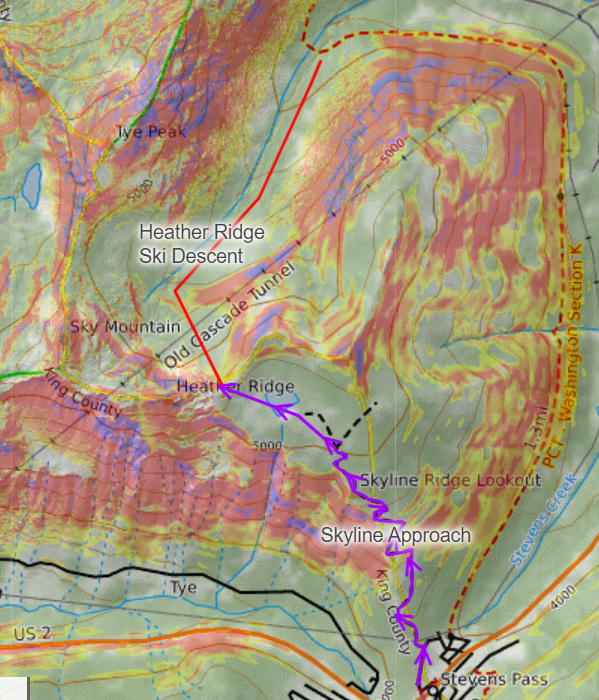
A GPX file holds all of the waypoint information along a route (the purple and red lines in the photo above.) You can create GPX files by tracking with a phone or a GPS watch; and then you can import those files to your computer to overlay on maps. The above screenshot is of a map that I have for Stevens Pass.
A GPX track can be useful in tour planning for calculating how far it is from Point A to Point B, how much vertical you’ll have to climb to get there, and how long a ski run might be.
In the field, a GPX track can be the difference between enjoying a delightful ski run in open glades or a heinous bushwhack in dense trees. Even in zones I frequent, I’ll pull out my phone and check my map to ensure that I’m on the best possible track before committing to the descent. When I find a nice hallway through the trees, I might drop a waypoint to ensure that I’m able to get there again in the future.
If you are lacking for GPX tracks, a quick and dirty way to get some ideas is to google the zone you’re interested in, for example: “Snoqualmie Pass GPX Track Caltopo.” Just know that it’s one of those ‘hard sayin’ not knowin’ situations where you won’t know who made the track and how reliable they might be.
Another new-to-me resouce that I’m quickly finding value in is OnX maps. The appeal of this site is that it bundles all of your need-to-know details: how far, how much vertical, forecasted avalanche hazard, etc. Since I’m still learning the in’s and out’s, that’s all I’ll say.
MAKE YOUR GPX TRACKS DO MORE FOR YOU
Once we have GPX tracks, we can export them to KML files to get a more 3D model in Google Earth. I use CalTopo, so I’m going to show you how to export from CalTopo to Google Earth using a desktop computer. Follow along with this screenshot guide:
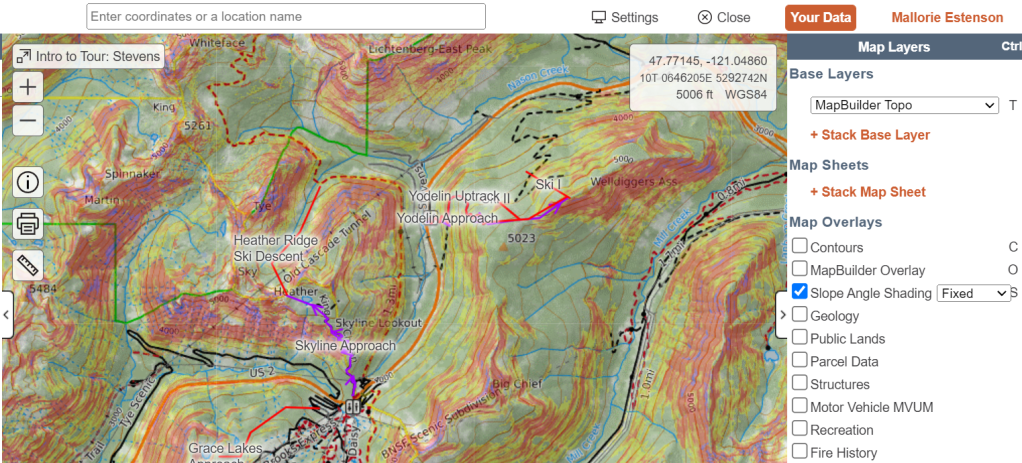
Click the orange “Your Data” button in the top right corner of the page to open the map and tracks you’d like to overlay in Google Earth.

On the left side of the page, you’ll see ‘Map Objects’ where all of the pieces of your map are listed. Make sure all boxes beside tracks that you’d like to see on Google Earth are checked, and click the ‘Export’ button.
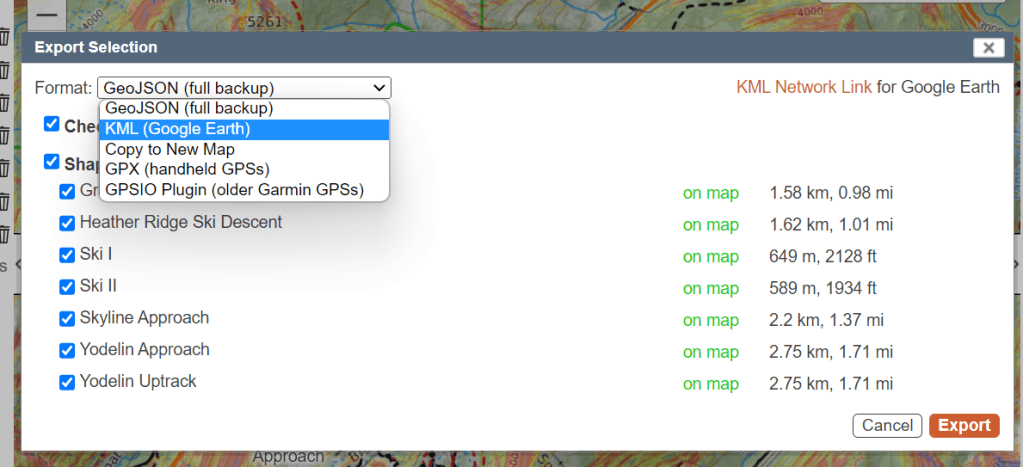
This will open a dialogue box where again, you’ll confirm all the items you’d like to export to Google Earth. From the drop down menu at the top of the box, choose the “KML” file type. Click the orange ‘Export’ button at the bottom right.
Open Google Earth.
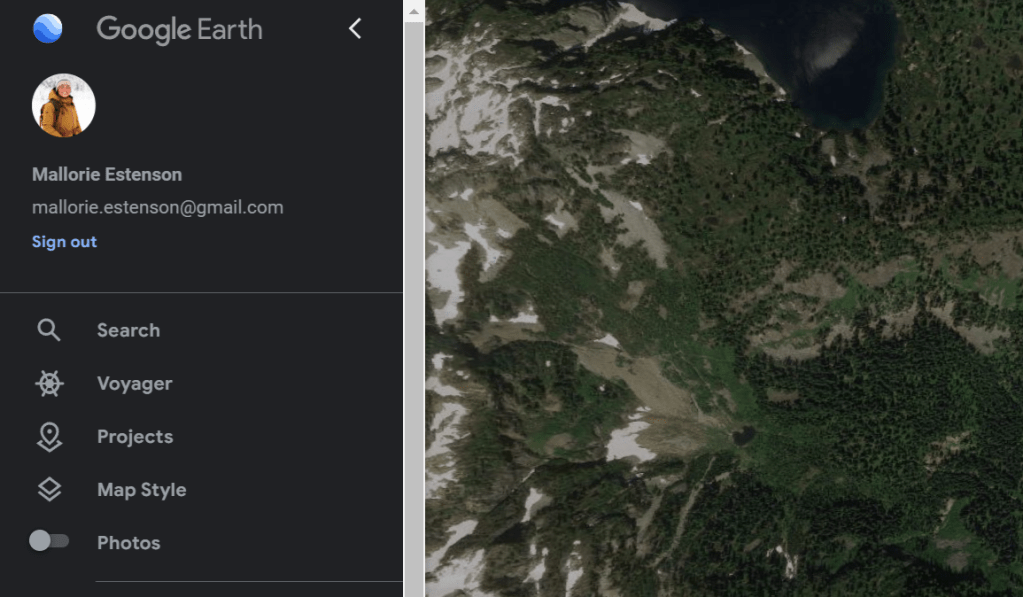
Click the pancake stack button at the top left corner of Google Earth. Login if you’re not already logged in. And from the menu bar, click ‘Projects.’

Next, click the “New Projects” button and choose “Import KML file from computer.” We’ll import the files that we pulled from CalTopo.

First, you’ll get the birdseye view of whatever you imported. I also like to rename the import to keep things organized. (Just click the pencil beside “CalTopo Export” to edit.)
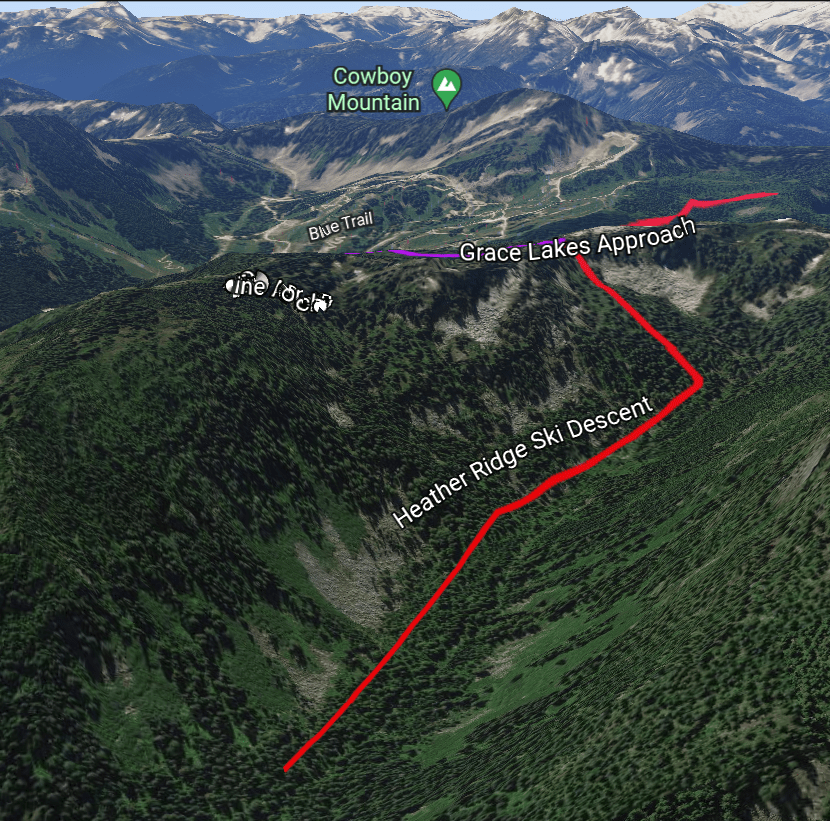
While the imagery isn’t exactly the right season, it gives me a great sense for what my ski run might look like with regard to tree density, where it starts, where it stops, etc.
I find that this is very helpful for getting my brain to wrap itself around a new zone.
Happy exploring! If you found this post useful, I’d love it if you bought me a beer or a coffee to support more content like this!

What’d you think?